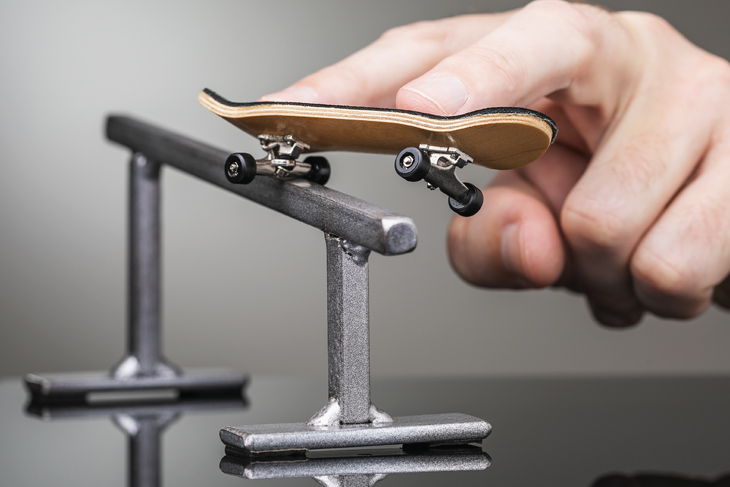
The Basic Guide to Fingerboard Grinding
In a previous article, we covered basic tricks involving finger manipulation of the board, but we’ve not yet talked about the basics of fingerboard grinding on objects yet. Grinding requires good hand-eye coordination as well as good timing and balance skills to successfully complete the trick. We’ll first cover the basic 50-50 grind.
Types of Fingerboard Grinding Techniques
1. 50-50 Grind on a Fingerboard
In order to complete the 50-50 grind, you’ll need a rail setup, whether it is homemade, or store bought. The basics of this involve the ability to perform an ollie, so make sure that you can do that moving at a moderate speed before reading on. Once you can pull off an ollie, you’ll want to catch and land the board directly on the rail. The weight of the board should be half distributed over both sides of the rail, and the board itself should be straddling the rail with your fingers flat and parallel to the top of the board for the best balance. If you feel like you might have balance problems, then it’s always a good idea to practice maintaining balance in a stationary position by holding your board still on the rail until you can get a feel for the weight.
2. 5-0 Grind
Another type of grind you can perform is the 5-0 grind. This involves performing an ollie to launch onto the rail, and then performing a manual while on the rail. It’s tricky because there’s a combination of different moves that we’ve previously covered here. To start, you’ll launch the board up using an ollie, and then use your rear finger to press down on the back of the board just like performing a manual. At this point, your board should be at roughly a 45-degree angle, and you will need to keep applying pressure to the rear of the board to keep it pointing up. When you are ready to land, all you need to do is put your front finger back on the board and bring it back down to the ground off of the rail.
It’s important do keep your finger on the center of the board to provide balance during the manual, because it will be significantly harder than performing it on a flat surface. Maintaining stability is key, so I recommend you practice by putting the board on the rail and holding it in the manual position while sliding it across the rail by doing a manual. Do this until you can make several uninterrupted slides across the rail.
3. Nose Grind
The last item we need to cover regarding finger grinding is the nose grind. This is basically the same thing as a manual rail grind, but backwards. Instead of the back end of the board on the rail, the front end is now on the rail. So, start off by doing an ollie to launch yourself onto the rail and apply pressure to the front of the board instead of the rear, with your index finger. This will cause the nose of the board to ride the rail, and the rear of the board to be lifted up in the air. You should be able to ride this position to the end of the rail and then put your middle finger back on the board to land it on the ground. To practice this, we recommend you practice by putting the board on the rail and holding it in the manual position with the nose down this time while sliding it across the rail by doing a reverse manual. Do this until you can make several uninterrupted slides across the rail.
It’s hard to understand the tricks simply by reading about them, so I encourage you to go on YouTube and watch videos in slow motion of these tricks, in order to fully comprehend the finger movements involved.

